Give composite decking a classic, eye-catching finish with our picture frame decking ideas. Below, we talk you through what’s meant by picture frame, examples of decking pattern ideas, and handy instructions on installing one for your composite decking.
What is picture frame composite decking?
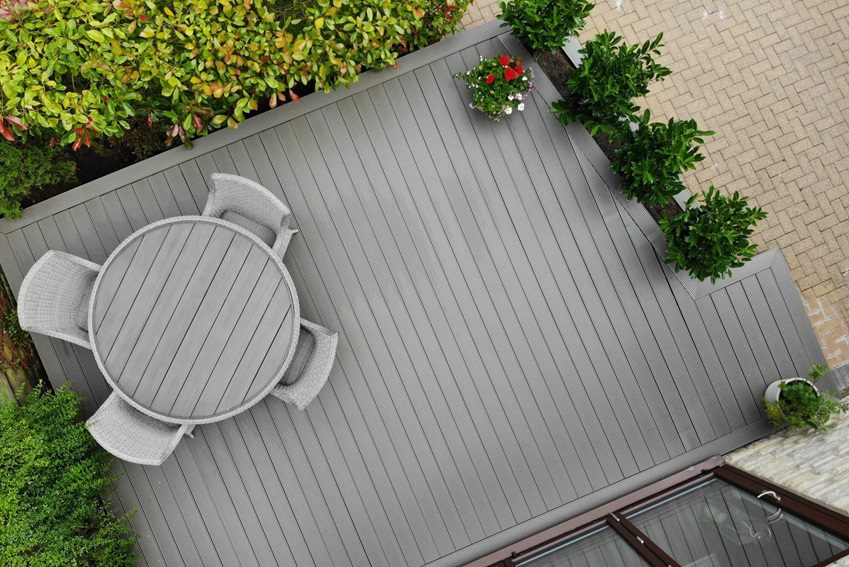
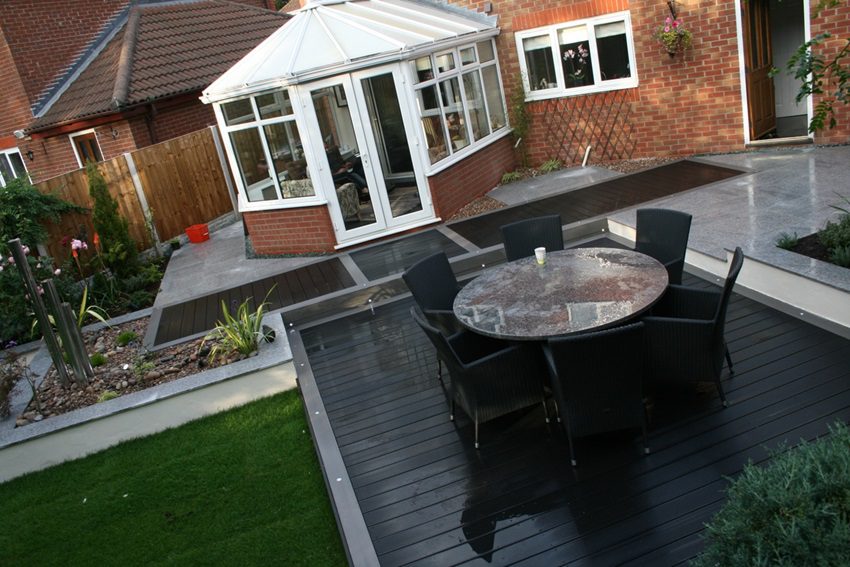
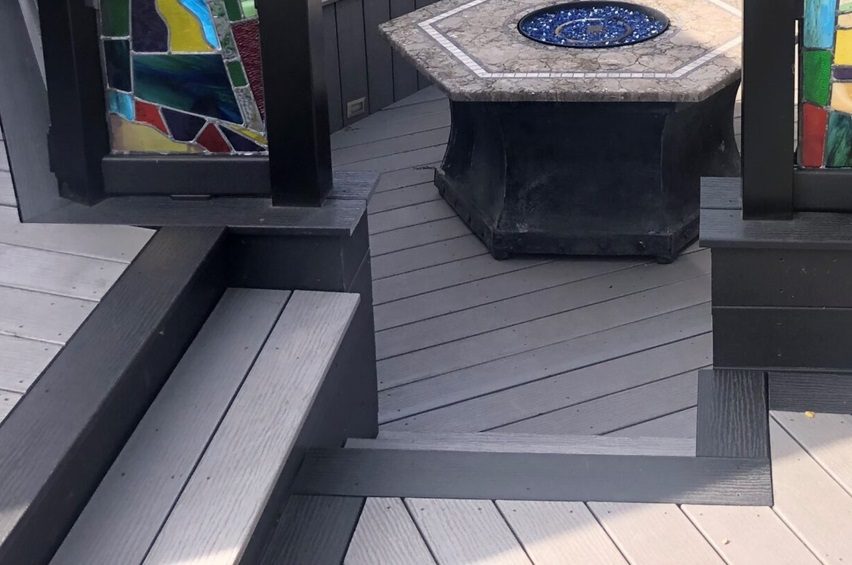
If you install a border around the perimeter of a decked area, then you’re adding a picture frame. Rather than leaving the end cuts of the decking boards exposed, you can install parallel and perpendicular boards to create a picture frame effect. The technique works well with all designs, from traditional and herringbone to diagonal decking patterns.
Picture frame deck pattern ideas
Getting a picture frame decking finish is easier than you may think, especially if you’re using Ecodek composite decking. Below, we’ve listed some of our favourite deck patterns to inspire you.
For a full list of ideas, read: Composite decking patterns.
How to use different colours for picture-perfect contrast
Using two different shades of boards from our decking collections will create a subtle colour contrast for understated elegance. If you choose capped composite decking from Ecodek, opt for Ice Grey boards with a Smokey Grey border for a sleek finish. For a warmer look, our Cinnamon Brown infill is homely and inviting with a Hickory Brown surround.
Elevate your picture frame with texture
Composite boards are versatile and come in various textures, so you can create a decking area that’s pleasing to the eye and underfoot. Our Signature AT reversible ribbed and grooved collection is available in black, browns, or greys. Try narrow ribbed boards in the middle and wide grooves around the edges for a timeless composite decking picture frame.
Combine colours with texture
If you’re looking to make a statement, mix colours and finishes and let your picture frame decking do the talking. Our uncapped wood effect, ribbed and grooved, and scalloped deck boards all come in the same colours, so you could install a grey woodgrain infill deck with a brown grooved edging for a playful yet aesthetic finish.
Consider corner cuts
How you cut the corners of the decking boards will influence whether the composite deck picture frame looks more classic or contemporary. If you cut at a 45° angle, you’ll get a classic finish. If you cut at a sharper 90° angle, the deck will look more contemporary. Decisions, decisions!
For more information on how to get a stylish finish, read our advice: How to finish composite decking edges.
Picture frame boarder depth
The border of your decking picture frame can be as deep or narrow as you like – it depends on the finish you’re after and the amount of available space. It’s worth laying boards down before installation to decide whether a single board works best for the frame, or if two or three (or more!) create the effect you’d like.
How to install a picture frame on composite decking
Once you’ve finalised your picture frame decking design, it’s onto the installation.
What tools are required to make a decking picture frame?
Good news – the tools, fixtures, and fittings you need to install a picture frame deck are the same as those you need to fit the rest of the decking boards. However, it’s important that you check the board manufacturer’s recommendations before you start, to make sure you have absolutely everything you need for a smooth install.
- Power mitre saw/Circular saw
- Cordless drill
- Cordless driver
- Recommended fasteners and installation tools
- Exterior grade construction screws
- Protective glasses
- Set square
- Spirit level
- Tape measure
Use our decking screws and clips page to learn more about the right fixings for your decking project or view all accessories.
Installation steps for composite decking picture frame
There are just four simple steps to follow to install a picture-perfect decking border.
1. Install the correct sub-frame support
A picture frame design requires additional support around the edges where the boards run perpendicular to the infill boards. So, you’ll need additional composite joists or support beams and blocks to these edges.
Where border boards run at a 90° angle to the main run of boards, you need to install double joists. All infill boards that meet a picture frame border must be fully supported by a block beneath the ends of each board, too.
2. Measure and cut your picture frame deck boards
With the support sorted, it’s onto measuring the boards for length. Remember to incorporate an expansion gap, as per the manufacturer’s guidelines! Then, use a set square to mark your boards at a 90° or 45° angle. You can now cut your decking – a mitre saw is the ideal tool for cutting picture frame boards for a neat finish.
3. Install your picture frame deck boards
The picture frame boards, which run parallel to the main run of infill boards, can be fitted following the manufacturer’s standard installation instructions. When you install the perpendicular boards, ensure they’re being laid on the double joists you fitted in step one. Once you’ve laid your boards, you need to securely fasten them in place using fixtures and fittings recommended by the manufacturer.
4. Add the infill deck boards
With the edge boards securely in place, you can then fit the main composite decked area. We always advise following the manufacturer’s instructions when installing your infill boards – again, remember to incorporate gaps at the end of each board to allow for expansion.
There you have it, your guide to choosing and installing a picture frame around composite decking for an eye-catching finish.
If you’d like more information on how to install a picture framed deck design, view our installation guides or call our friendly, expert team on 01978 667 840. And to work out how many boards you’ll need to complete your frame, use our composite decking calculator.